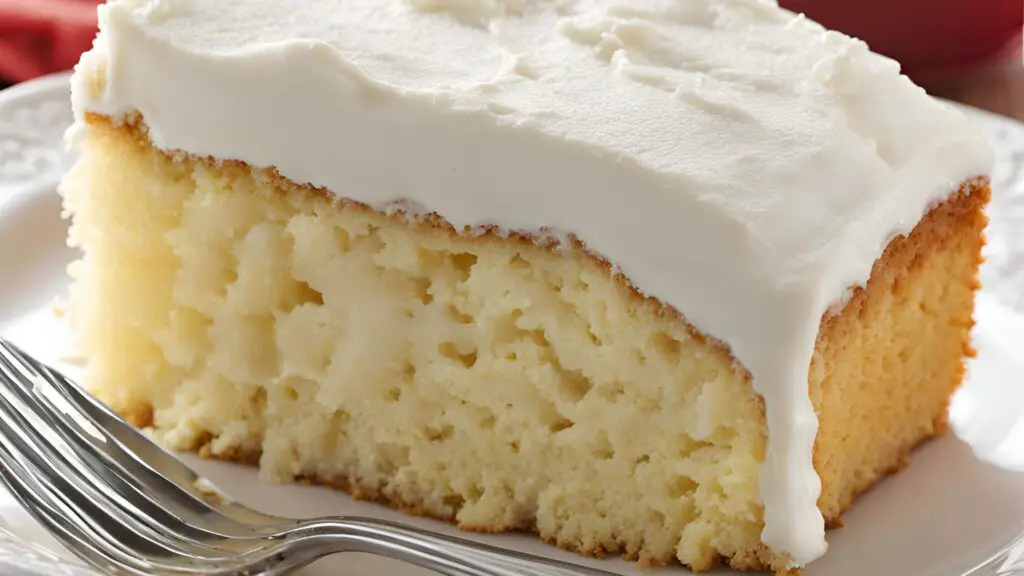
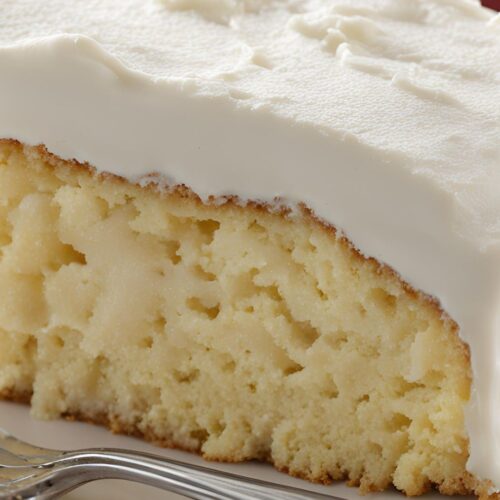
This homemade Bisquick Vanilla Cake is a deliciously simple treat that blends the ease of Bisquick with the classic flavors of vanilla and butter.
This light, fluffy cake is a breeze to make and is perfect for any occasion. Topped with a creamy cream cheese frosting that adds a rich, tangy contrast, it’s sure to be a crowd-pleaser at your next gathering or family meal.
With minimal prep time and effort, it’s an ideal recipe for both beginner bakers and experienced ones alike.
Let’s dive into how to make this wonderful Bisquick vanilla cake. I’ll guide you through each step, ensuring it’s as simple and straightforward as possible.
How To Prepare Bisquick Vanilla Cake?
Recipe Details
- Preparation Time: 10 minutes
- Cooking Time: 30 minutes
- Total Time: 40 minutes
- Course: Dessert
- Difficulty: Easy
- Cuisine: American
- Calories: Approx. 300 calories per slice
- Yield: 8 servings
Special Equipment Needed
- Mixing bowls
- Electric mixer (optional)
- 9×9-inch baking pan
- Spatula
- Measuring spoons and cups
- Cooling rack

Ingredients
For the Cake:
- 2 cups Bisquick mix
- 1 cup granulated sugar
- 1/2 cup unsalted butter, softened
- 1 cup milk
- 2 large eggs
- 1 tablespoon vanilla extract
For the Frosting:
- ½ cup cream cheese, softened
- ¼ cup unsalted butter, softened
- 1½ cups powdered sugar, sifted
- 1 teaspoon vanilla extract
How To Make Bisquick Vanilla Cake
1. Preheat your oven to 350°F (175°C). Grease and flour a 9×9-inch baking pan.
2. In a large mixing bowl, cream together the softened butter and granulated sugar until smooth and fluffy. Add the eggs and vanilla extract, mixing well.
3. Gradually add the Bisquick mix and milk, alternating between the two. Stir until the batter is smooth and well-combined.
4. Pour the batter into the prepared pan and spread it evenly. Bake for 25-30 minutes or until a toothpick inserted into the center comes out clean.
5. While the cake is baking, prepare the frosting. In a separate bowl, beat the cream cheese and butter together until creamy and smooth. Gradually add the powdered sugar and vanilla extract, beating until fluffy and spreadable.
6. Once the cake has cooled, frost with the cream cheese frosting. Slice, serve, and enjoy your delicious Bisquick Vanilla Cake!
Special Notes
◈ Flavor Variations: This cake is versatile! Feel free to add chocolate chips, nuts, or fresh fruit to the batter for a twist. You can also add a teaspoon of almond extract for a unique flavor.
◈ Make It Gluten-Free: You can swap the Bisquick with a gluten-free version of Bisquick if you need a gluten-free dessert.
◈ Storage Tips: Store the cake in an airtight container at room temperature for up to 3 days, or refrigerate it to extend its freshness for up to a week. This cake also freezes well – wrap it tightly in plastic wrap and foil, then freeze for up to 3 months.
Serving Suggestions
This Bisquick Vanilla Cake is incredibly versatile! You can serve it as is for a simple, comforting treat, or you can add frosting to elevate it for birthdays or celebrations.
I love topping mine with a dusting of powdered sugar, fresh berries, and a dollop of whipped cream for a beautiful and delicious presentation.
If you prefer a richer option, slather it with chocolate ganache or cream cheese frosting!
Health Benefits
While this Bisquick Vanilla Cake isn’t exactly a health food, it does have a few redeeming qualities when enjoyed in moderation!
Bisquick is made with enriched flour, providing some added vitamins and minerals. Plus, it contains no trans fats, and the eggs in the recipe provide protein, healthy fats, and essential vitamins.
If you’re craving a sweet treat, this cake makes a relatively lower-calorie dessert compared to many other cakes, especially if you opt for lighter toppings like fresh fruit or whipped cream instead of heavy frostings.
Tips And Variations
1. Flavored Variations: If you want to spice up the flavor, you can add lemon zest, almond extract, or even cinnamon for a unique twist.
2. Make it a Layer Cake: If you want a more dramatic presentation, you can double the recipe and bake it in two pans for a layered cake. Just be sure to adjust the baking time accordingly.
3. Add-ins: Consider folding in chocolate chips, nuts, or dried fruit into the batter for extra texture and flavor.
4. Dairy-Free: Swap out the butter for a plant-based butter and use almond or oat milk instead of regular milk to make this cake dairy-free.
FAQs About Bisquick Vanilla Cake
Can I use a different type of cake mix instead of Bisquick?
Yes, you can substitute Bisquick with other all-purpose cake mixes, but it may affect the texture and flavor slightly. Bisquick provides a unique light and fluffy texture, so using another mix might change the outcome.
How do I store leftover Bisquick Vanilla Cake?
Store leftover cake in an airtight container at room temperature for up to 3 days. If you need to keep it longer, refrigerate it for up to a week. Make sure to bring it to room temperature before serving for the best texture.
Can I make the cake ahead of time?
Yes, you can make the Bisquick Vanilla Cake a day or two in advance. Just store it in an airtight container, and frost it closer to serving time to keep the frosting fresh.
Can I make the frosting ahead of time?
Yes, you can make the cream cheese frosting ahead of time. Store it in an airtight container in the refrigerator for up to 3 days. Let it come to room temperature before spreading it on the cake for a smoother consistency.
Is this cake gluten-free?
No, Bisquick contains gluten, so this cake is not gluten-free. However, you can try using a gluten-free Bisquick mix if you need a gluten-free version, and it should work similarly with the same recipe.
Conclusion
Baking a cake from scratch can seem intimidating, but this Bisquick Vanilla Cake recipe shows that it doesn’t have to be hard.
With only a handful of simple ingredients and little effort, you can create a light, flavorful cake that’s perfect for any occasion.
If you’re looking for a quick and tasty dessert, I highly recommend giving this recipe a try. Enjoy the simplicity and deliciousness!
More Amazing Vanilla Cake Recipes
Ridiculous Vanilla Cake Recipe – Creamy Richness
Festive Cranberry Vanilla Cake For Every Occasion
Vanilla Tea Cake Recipe | Deliciously & Soft
Keto Vanilla Cake Recipe – Party Treat
Depression Cake Recipe Vanilla – Egg-Free

Bisquick Vanilla Cake
Equipment
- Mixing bowls
- Electric mixer (optional)
- 9×9-inch baking pan
- Spatula
- Measuring spoons and cups
- Cooling rack
Ingredients
For the Cake:
- 2 cups Bisquick mix
- 1 cup granulated sugar
- 1/2 cup unsalted butter softened
- 1 cup milk
- 2 large eggs
- 1 tablespoon vanilla extract
For the Frosting:
- ½ cup cream cheese softened
- ¼ cup unsalted butter softened
- 1½ cups powdered sugar sifted
- 1 teaspoon vanilla extract
Instructions
- Preheat your oven to 350°F (175°C). Grease and flour a 9×9-inch baking pan.
- In a large mixing bowl, cream together the softened butter and granulated sugar until smooth and fluffy. Add the eggs and vanilla extract, mixing well.
- Gradually add the Bisquick mix and milk, alternating between the two. Stir until the batter is smooth and well-combined.
- Pour the batter into the prepared pan and spread it evenly. Bake for 25-30 minutes or until a toothpick inserted into the center comes out clean.
- While the cake is baking, prepare the frosting. In a separate bowl, beat the cream cheese and butter together until creamy and smooth. Gradually add the powdered sugar and vanilla extract, beating until fluffy and spreadable.
- Once the cake has cooled, frost with the cream cheese frosting. Slice, serve, and enjoy your delicious Bisquick Vanilla Cake!