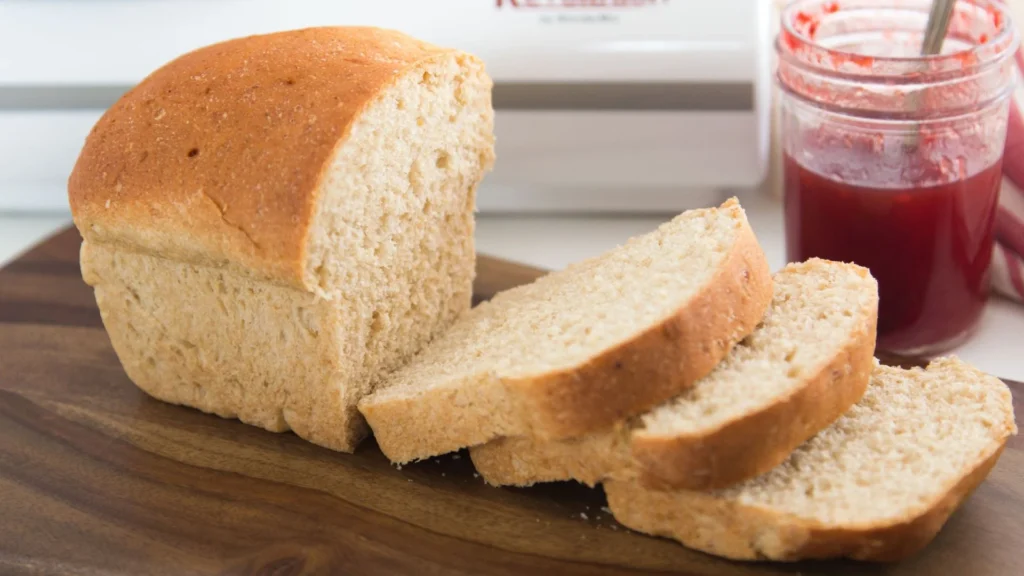
This KitchenAid wheat bread recipe brings fresh, wholesome bread into any kitchen using basic, nourishing ingredients like whole wheat flour, honey, warm water, and oil.
Creating this KitchenAid wheat bread recipe allows the exploration of flavors, textures, and healthy baking methods while saving time and effort through the stand mixer.
The main purpose of this KitchenAid wheat bread recipe is to provide home bakers, families, and bread enthusiasts a reliable way to enjoy fresh, soft, and nutritious bread every day.
The history of wheat bread baking with mixers grew as kitchen technology advanced, making homemade bread accessible and consistent.
Now comes the guide to making this bread, including serving ideas, tips, health benefits, variations, preservation, and practical answers to common questions.
Is KitchenAid Good For Making Bread?
Yes, a KitchenAid mixer is excellent for making bread. Its powerful motor and dough hook attachment make kneading much easier and more efficient than doing it by hand.
The mixer ensures consistent mixing and kneading, which helps develop the gluten for a smooth, elastic dough. It can handle both small and large batches, making it ideal for baking bread regularly.
How To Prepare KitchenAid Wheat Bread Recipe?
Recipe Overview
Preparation Time: 10 minutes
Cooking Time: 35 minutes
Course: Bread
Calories: 140 kcal
Cuisine: American
Yield: 1 loaf

Kitchen Utensils
- KitchenAid stand mixer with dough hook
- Measuring cups and spoons
- Mixing bowl
- Loaf pan (8×4 inch)
- Clean kitchen towel or plastic wrap
- Oven
Ingredients
- 2 cups whole wheat flour
- 1 ½ cups all-purpose flour or bread flour
- 2 ¼ tsp instant dry yeast (1 packet)
- 1 ½ tsp salt
- 2 tbsp honey
- 1 cup warm water (about 110°F / 43°C)
- 2 tbsp oil (avocado, olive, or other neutral oil)
How to Make KitchenAid Wheat Bread Recipe
1. Activate the Yeast:
In the mixing bowl of your KitchenAid, combine the warm water and honey. Sprinkle the instant yeast on top and let it sit for 5–10 minutes until it becomes foamy.
2. Mix the Dough:
Attach the dough hook to the stand mixer. Add whole wheat flour, all-purpose flour, salt, and oil to the bowl. Mix on low speed until the dough comes together, then increase to medium speed for about 5–6 minutes until smooth and elastic.
3. First Rise:
Remove the dough from the bowl and lightly oil it. Place it back in the bowl and cover with a clean towel or plastic wrap. Let it rise in a warm area for 45–60 minutes, or until doubled in size.
4. Shape the Loaf:
Gently punch down the dough to release air. Transfer it to a lightly floured surface and shape it into a loaf. Place it into a greased 8×4-inch loaf pan. Cover and let it rise again for 20–30 minutes until slightly puffed.
5. Bake:
Preheat your oven to 375°F (190°C). Bake the bread for 30–35 minutes, or until golden brown on top and sounds hollow when tapped. Optional: brush with melted butter for a softer crust.
6. Cool and Serve:
Remove the bread from the pan and let it cool on a wire rack for at least 20 minutes before slicing. This ensures the texture sets and makes slicing easier.
Special Notes
For a softer crust, brush the loaf with a little melted butter after baking. You can substitute half of the whole wheat flour with white flour for a lighter texture. Honey can be replaced with maple syrup or sugar if desired.
Why You’ll Love This Recipe
This KitchenAid wheat bread recipe creates a soft, wholesome loaf with a rich, nutty flavor from whole wheat flour. Honey adds a touch of natural sweetness, and oil keeps the bread tender and moist.
Using a stand mixer simplifies kneading, making the process quicker and more consistent, even for beginners. The bread is versatile enough for toast, sandwiches, or as a side for meals.
Freshly baked, it fills the kitchen with a comforting aroma and delivers a satisfying, nutritious option for daily homemade bread.
Why My Recipe Works
This recipe works because it balances whole wheat and all-purpose flour, creating a loaf that is both hearty and soft. Instant dry yeast ensures reliable rising, while honey feeds the yeast for a gentle, natural sweetness.
Warm water and oil help develop a tender, moist crumb, and kneading with a stand mixer guarantees even gluten formation for consistent texture.
Allowing the dough to rise twice produces a light, airy loaf. Every ingredient and step is designed to produce a flavorful, well-structured bread that holds its shape and bakes evenly.
Serving Tips for KitchenAid Wheat Bread Recipe
This homemade kitchenaid wheat bread recipe can be enjoyed in many ways. Toast slices and spread with butter, nut butter, or avocado for a quick breakfast. Use it for sandwiches, pairing with fresh vegetables, lean meats, or cheeses.
Cut into cubes and lightly toast to make croutons for soups and salads. For a sweet treat, serve with honey, jam, or a drizzle of melted chocolate.
Warm slices slightly before serving to enhance the aroma and softness. This kitchenaid wheat bread recipe also pairs well with hearty soups or stews, adding a wholesome touch to any meal.
Kitchen Tips
1. Preheat Your Pan: Always preheat your pan before adding ingredients. This helps ensure even cooking and prevents food from sticking.
2. Use a Sharp Knife: A sharp knife is safer and more effective than a dull one. It makes slicing and chopping faster and more precise.
3. Measure Flour Correctly: Spoon flour into your measuring cup and level it off with a knife, rather than scooping directly from the bag, to avoid using too much.
4. Rest Dough: Let dough rest before shaping or baking. This allows the gluten to relax, resulting in better texture and rise.
5. Clean as You Go: Clean utensils and wipe down surfaces while you cook. It keeps your workspace organized and reduces mess after the meal.
Health Benefits This Recipe
KitchenAid wheat bread recipe offers several health benefits. Whole wheat flour is rich in fiber, supporting digestion, promoting fullness, and helping maintain stable blood sugar levels.
Healthy fats from olive or avocado oil contribute to heart health. Honey provides natural antioxidants and mild antibacterial properties.
The KitchenAid wheat bread recipe contains essential vitamins and minerals such as B vitamins, iron, magnesium, and zinc, which support overall wellness.
Regular consumption of whole grain bread may reduce the risk of chronic conditions like diabetes and heart disease, while providing steady energy throughout the day.
Variations
✔ Nut and Seed Wheat Bread: Add ¼ cup chopped walnuts, sunflower seeds, or pumpkin seeds to the dough during the final minutes of kneading. This adds crunch, extra fiber, and healthy fats, creating a heartier loaf perfect for sandwiches or toast with nut butter.
✔ Herb and Garlic Wheat Bread: Mix 1–2 teaspoons dried herbs like rosemary, thyme, or oregano and 1 clove minced garlic into the flour before kneading. This produces an aromatic, flavorful bread that pairs beautifully with soups, salads, or pasta dishes.
✔ Fruit and Cinnamon Wheat Bread: Incorporate ½ cup raisins, dried cranberries, or chopped dates along with 1 teaspoon cinnamon into the dough. This slightly sweet, spiced loaf works well for breakfast toast or as a snack with butter or cream
Storage
This KitchenAid wheat bread recipe stays fresh when stored properly. Allow the loaf to cool completely before wrapping it tightly in plastic wrap, aluminum foil, or placing it in an airtight container to prevent drying out.
At room temperature, it will remain soft and fresh for 2–3 days. For longer storage, slice the bread and freeze it in a freezer-safe bag for up to 3 months.
To enjoy, thaw slices at room temperature or toast them directly from frozen. Avoid refrigerating the bread, as this can cause it to dry out and lose flavor.
Frequently Asked Questions
Can I use all whole wheat flour instead of mixing with all-purpose flour?
Using only whole wheat flour will make the bread denser and heavier. Mixing with all-purpose or bread flour helps achieve a softer, lighter texture.
Can I substitute honey with another sweetener?
Yes, maple syrup, agave nectar, or even granulated sugar can be used, but liquid sweeteners may slightly affect dough consistency.
How do I know when the bread is fully baked?
The loaf should be golden brown on top and sound hollow when tapped on the bottom. An internal temperature of 190–200°F confirms it is done.
Can I make this bread without a stand mixer?
Yes, you can knead the dough by hand on a floured surface for 8–10 minutes until smooth and elastic.
How long does the bread stay fresh?
At room temperature, it stays soft for 2–3 days. Freezing slices in an airtight bag preserves it for up to 3 months.
Conclusion
This delicious and healthy KitchenAid wheat bread recipe brings joy every time it is made. Its soft texture, wholesome ingredients, and natural sweetness make it a favorite for anyone who tastes it.
I created this KitchenAid wheat bread recipe to serve fresh, nourishing bread quickly, and I enjoy baking it again and again. Sharing this easy method allows others to experience the same satisfaction and comfort.
I hope this KitchenAid wheat bread recipe inspires you to try baking at home, enjoy the process, and delight in the warmth and flavor of homemade wheat bread.
More Delicious Bread Recipes For You
Bread Stuffed With Cheese Recipe || Cheesy Delight
Gluten-Free Whole Wheat Bread Recipe – Best Here’s
Fluffy Wheat Bread Recipe – Homemade Goodness
Banana And Oat Bread Recipe – Great Breakfast
Deliciously Bread Cheese Balls Recipe

KitchenAid Wheat Bread Recipe
Equipment
- KitchenAid stand mixer with dough hook
- Measuring cups and spoons
- Mixing bowl
- Loaf pan (8×4 inch)
- Clean kitchen towel or plastic wrap
- Oven
Ingredients
- 2 cups whole wheat flour
- 1 ½ cups all-purpose flour or bread flour
- 2 ¼ tsp instant dry yeast 1 packet
- 1 ½ tsp salt
- 2 tbsp honey
- 1 cup warm water about 110°F / 43°C
- 2 tbsp oil avocado, olive, or other neutral oil
Instructions
Activate the Yeast:
- In the mixing bowl of your KitchenAid, combine the warm water and honey. Sprinkle the instant yeast on top and let it sit for 5–10 minutes until it becomes foamy.
Mix the Dough:
- Attach the dough hook to the stand mixer. Add whole wheat flour, all-purpose flour, salt, and oil to the bowl. Mix on low speed until the dough comes together, then increase to medium speed for about 5–6 minutes until smooth and elastic.
First Rise:
- Remove the dough from the bowl and lightly oil it. Place it back in the bowl and cover with a clean towel or plastic wrap. Let it rise in a warm area for 45–60 minutes, or until doubled in size.
Shape the Loaf:
- Gently punch down the dough to release air. Transfer it to a lightly floured surface and shape it into a loaf. Place it into a greased 8×4-inch loaf pan. Cover and let it rise again for 20–30 minutes until slightly puffed.
Bake:
- Preheat your oven to 375°F (190°C). Bake the bread for 30–35 minutes, or until golden brown on top and sounds hollow when tapped. Optional: brush with melted butter for a softer crust.
Cool and Serve:
- Remove the bread from the pan and let it cool on a wire rack for at least 20 minutes before slicing. This ensures the texture sets and makes slicing easier.